

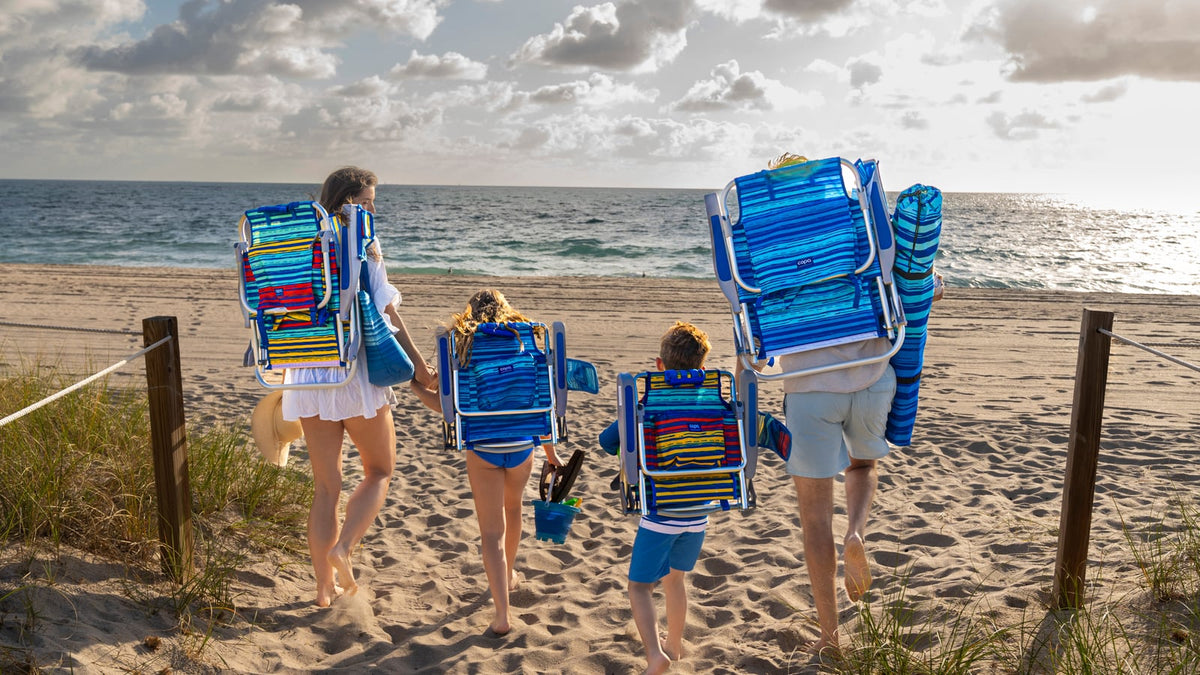
Most families spend the first 20 minutes of a beach day wrestling with gear instead of enjoying it. A canopy that won't anchor properly, a pole that doesn't quite fit, a frame that lists sideways the moment a gust hits, these are not minor inconveniences. They are the difference between a relaxed morning and a frazzled one. The good news is that a fast, secure beach cabana setup is not a matter of luck or muscle. It is a matter of method.
This guide walks through every step of setting up a beach cabana for families in under 10 minutes, from choosing your spot to anchoring your shade so securely that you can walk away to the water without a second thought. Whether you are working with Copa's purpose-built shade system or building better habits with any premium setup, these steps reflect how experienced beach families actually do it, not the generic advice printed on a box.
The core principle driving everything here: preparation happens before you hit the sand, not after. Families who set up fast do most of their thinking in the parking lot.
What You Need Before You Touch the Sand
The fastest beach cabana setups always begin with the same pre-beach ritual: a gear check that takes less than five minutes at home or in the parking lot. Skipping this step is the single most common reason a setup that should take 8 minutes stretches to 25.
Essential Gear Checklist
Before heading to your spot, confirm you have everything accounted for and in working order. A missing stake, a broken connector, or a canopy left in the car turns a smooth process into a scramble.
- The canopy or cabana structure, poles, connectors, and fabric all together in one bag
- The anchor system, Copa's Anchor Max® or equivalent weighted/screw anchor
- Sand stakes or guy-line pegs, at least four for corner stabilization
- Guy lines or tension straps, pre-attached is better; rethreading them on a windy beach is miserable
- A mallet or rubber hammer, for firmer sand conditions; not always needed in soft dry sand
- A small towel or cloth, for wiping down connectors and poles if they're sandy from a previous trip
- Sunscreen, water, and snacks staged, so the moment the shade is up, everyone transitions into relaxation mode instantly
If you are using Copa's Deluxe Bundle or Essentials Bundle, the system is designed so all components ship together and store together, which eliminates the most common cause of missing parts. Coordinated bundles are not just a convenience purchase, they are a logistics solution for family beach days where there are already too many things to track.
The Parking Lot Rule
Experienced beach families know that the parking lot is where a beach day is won or lost. Before walking to the sand, take 90 seconds to:
- Unzip the canopy bag and confirm all poles and connectors are present
- Verify the anchor is in the bag and not still sitting in the garage
- Assign one adult to carry the shade structure and one to manage the chairs and cooler
- Identify who is setting up and who is managing kids during setup, divide labor before you need it
This is not overthinking. This is the system that consistently gets families from parking lot to shaded, seated, and relaxed in under 15 minutes total walk time included.
Step 1: Scout and Claim Your Spot (1 Minute)
Choosing the right location on the beach is not just about aesthetics. The wrong spot can make your canopy unstable, expose your family to more wind than necessary, and force a full relocation 20 minutes in. The right spot makes every subsequent step easier and faster.
Estimated time: 60 seconds of active scouting, then commit.
What to Look For
Walk slightly past the first cluster of families setting up near the access point. The best spots are typically 30 to 50 feet further down the beach where the sand is less churned and there is more room to spread out without being crowded by neighboring setups.
Assess the following before dropping your gear:
- Sand firmness: Dry, loose sand near the dunes holds anchors poorly. Slightly damp, compact sand closer to the water line holds significantly better. For families with young children, a mid-beach position balances anchor hold with safe distance from the surf.
- Wind direction: Position your cabana so the open face is oriented away from the prevailing wind. This reduces drag on the canopy and keeps the interior comfortable. A quick check, wet your finger and hold it up, or simply watch which way other families' flags and towels are blowing.
- Angle to the sun: Note where the sun is now and where it will be in two to three hours. A cabana angled slightly east in the morning and adjusted or repositioned slightly west in the afternoon keeps your family in consistent shade without major structural moves.
- Clearance around the perimeter: You need at least three feet on each side for stakes and guy lines. Do not set up in a space so tight that your anchor lines become a trip hazard for passing beachgoers.
- Proximity to water access: For families with toddlers, a spot with a clear, unobstructed sightline to the water is essential for supervision.
Common Mistake to Avoid
Do not set up in the first open space you see. The reflexive move is to drop gear at the first available gap, but this often puts families in high-traffic areas near access paths, directly in the wind corridor, or on sand that is too loose for reliable anchoring. One extra minute of scouting saves multiple course corrections later.
Step 2: Lay Out Your Components (90 Seconds)
Organized unpacking is not a personality quirk, it is a technique that cuts setup time by a third. Families who dump everything out of the bag and then search for parts during setup take two to three times longer than those who lay components out deliberately before assembly begins.
Estimated time: 90 seconds.
The Assembly Staging Method
Before connecting a single pole, lay every component out on the sand in the rough position it will occupy in the finished structure. For a standard family beach canopy:
- Place the center pole or hub in the center of where the shade will stand
- Lay each leg or perimeter pole extending outward from the hub, like spokes on a wheel
- Place connectors at each joint location before you need them
- Set the folded canopy fabric on top of the hub so it is ready to unfurl
- Place stakes or anchor components at each corner position, approximately where they will go into the sand
This spatial pre-positioning means you are never reaching back into a bag mid-assembly. Every part is exactly where you need it, exactly when you need it.
Pro Tip: Pre-Connect Where You Can
Many canopy systems allow partial pre-assembly at home or in the parking lot. If your structure has a hub with extending arms, those arms can often be connected to the hub before you walk out to the beach. Arriving with a partially assembled frame means one fewer step in the sand, in the wind, and with kids pulling at your legs.
Copa's shade structures are designed with this in mind, the engineering prioritizes minimal on-beach assembly steps so that families with toddlers or multiple children can get shade up before anyone has a chance to overheat or get restless.
Step 3: Assemble the Frame (2–3 Minutes)
Frame assembly is where most people slow down unnecessarily. The key insight is that you are not trying to build something perfect on the first attempt, you are building something structurally complete that you will tension and true up in the anchoring step. Fighting for perfect alignment before anchoring wastes time and is actually counterproductive because the anchor process naturally pulls the frame square.
Estimated time: 2 to 3 minutes.
Pole Connection Sequence
Work from the center outward. For hub-and-spoke style canopies:
- Connect the vertical center pole first. This is your reference point for everything else. Make sure it seats fully into the hub, a half-seated pole will cause the whole structure to rack under tension.
- Connect opposite leg pairs simultaneously. Connect the front-left leg, then immediately connect the back-right leg. Then front-right, then back-left. This keeps the frame balanced as it goes up and prevents it from wanting to tip in one direction.
- Check that all locking buttons or twist-lock collars are fully engaged before proceeding. A pole that feels locked but is not will slip under load, which is both dangerous and frustrating.
- Attach the canopy fabric to the frame before raising the structure to full height. It is dramatically easier to clip or velcro fabric to a frame at knee height than at arm height.
For Tunnel or A-Frame Style Cabanas
Some beach cabana for families designs use a tunnel or A-frame structure rather than a hub-and-spoke. For these:
- Insert flexible poles into the pole sleeves in the canopy fabric before standing anything up
- Once all poles are threaded, push the structure upright from one end and walk the opposing end out to full extension
- Clip or stake the floor edges (if the cabana has a floor) to prevent the structure from collapsing inward
The critical mistake in A-frame assembly is trying to thread poles into sleeves while the structure is upright. Do it flat on the sand, then raise. This alone can save three to four minutes.
Wind Management During Assembly
On a breezy day, a partially assembled canopy acts like a sail. Keep the canopy fabric rolled or folded until the frame is fully assembled, then unfurl it quickly and get at least two stakes in the ground before the wind catches the full panel. Having a second adult hold the windward side of the canopy during this transition is the most effective way to manage this.
Step 4: Deploy the Anchor Max® System (2 Minutes)
This is the step that separates a beach cabana that stays put from one that becomes a projectile. Anchoring is not the last step, it should be treated as the most important step, and Copa's patented Anchor Max® system is purpose-built to make it both fast and reliable in real beach conditions.
Estimated time: 2 minutes for full anchor deployment.
Why Standard Anchoring Methods Fail
The conventional approach to anchoring a beach canopy is to push a thin stake into the sand and hope the friction holds. On a calm day, this works. On any day with wind, or on dry, loose sand, standard stakes pull free under load. The canopy tips, the structure shifts, and the whole setup needs to be redone.
Copa's Anchor Max® addresses this at the design level. Rather than relying on friction alone, the Anchor Max® uses a mechanical advantage system that leverages the weight and density of compacted sand against itself, creating a hold that increases as upward force is applied. In practical terms, this means the harder the wind pulls on your canopy, the more firmly the anchor holds.
Anchor Max® Deployment Steps
- Identify the four anchor points on your canopy structure, typically the four corner stakes or the main pole base plus corner guy-line points.
- For the primary anchor point (center pole base): Insert the Anchor Max® into the sand at a slight angle away from the structure (approximately 10 to 15 degrees from vertical, angled outward). This angle creates mechanical resistance against the direction of pull.
- Rotate the anchor as you push it down rather than hammering or forcing it straight in. The rotating action displaces sand outward, creating a wider footprint underground than the visible surface hole suggests. This is what gives the Anchor Max® its exceptional hold in loose or dry sand.
- Push the anchor to full depth, the entire shaft should be below the sand surface, with only the attachment point visible. Partial insertion is the most common setup error and the leading cause of anchor failure under wind load.
- Attach the pole or guy line to the anchor's connection point and take up slack before tensioning. A loose attachment point allows the structure to shift, which transfers load unevenly and can cause the anchor to rock free over time.
- Repeat at each corner stake point, alternating sides to keep even tension across the structure as you go.
Sand Condition Adjustments
| Sand Condition | Anchor Depth Needed | Technique Adjustment | Hold Rating |
|---|---|---|---|
| Dry, loose (dune area) | Full depth + angled outward 20° | Rotate slowly; pack sand around base after insertion | ⚠️ Moderate, check every 30 min |
| Mid-beach dry sand | Full depth, 10–15° angle | Standard rotation method | ✅ Good |
| Slightly damp compact sand | Full depth, 10° angle | Standard rotation; minimal effort needed | ✅ Excellent |
| Wet, near-waterline sand | Full depth, vertical | Drive straight down; water-saturated sand holds well | ✅ Excellent |
| Packed hardpan (some gulf beaches) | As deep as possible | Pre-loosen with a probe or tent stake; then insert Anchor Max® | ✅ Very Good |
Step 5: Tension and True the Structure (1–2 Minutes)
Once the frame is assembled and anchors are set, the final structural step is tensioning. This is the step most families skip because the canopy looks fine, and it is also the step that determines whether the structure stays fine for the next six hours or starts slowly failing under wind load.
Estimated time: 60 to 90 seconds.
What "Truing" Means in Practice
A canopy structure is "true" when all poles are plumb or at their designed angle, all connectors are fully seated, and the canopy fabric is evenly tensioned across the frame with no pooling, sagging, or bunching. An untrue structure channels wind load unevenly, which concentrates stress at specific connection points and accelerates wear or failure.
To true your structure:
- Stand back and look at the whole structure from 10 feet away. It should look symmetrical and upright. If it leans to one side, the anchor on the opposite side needs to be tightened or the pole on the leaning side needs to be adjusted.
- Check the canopy fabric for even tension. The surface should be taut with no significant sag in the center. A sagging center collects wind and rain and creates a downward force that can collapse the center pole over time.
- Tighten all guy lines evenly. Work in a cross pattern: front-left, then back-right, then front-right, then back-left. This distributes tension symmetrically the same way you tighten lug nuts on a car wheel, it keeps everything centered.
- Do a pull test on the main anchor point. Grip the center pole or main attachment and apply upward pressure. You should feel solid resistance with zero movement. Any wobble means the anchor is not fully seated and needs to go deeper.
Adjusting for Wind Mid-Day
As the day progresses and wind conditions change, check your tension every hour or so. Sand settles, especially around anchor points, and what was taut in the morning can develop slack by afternoon. A 30-second re-tension check is far easier than dealing with a collapsed structure with a toddler underfoot.
Step 6: Configure Your Shade Zone (1–2 Minutes)
The structure is up. The anchor is set. Now comes the step that determines whether your family actually uses the shade or drifts back into direct sun because the interior is awkward, crowded, or inconvenient. A well-configured shade zone is a deliberate design decision, not an afterthought.
Estimated time: 60 to 120 seconds.
Positioning Chairs and Gear
Place chairs facing inward and toward the water so the shade structure blocks the sun from behind and above while the view remains unobstructed. For a family with young children, the standard configuration is:
- One or two adult chairs positioned with a direct sightline to the water
- A shaded play area or blanket zone on the sand beneath the canopy's deepest shade
- A central gear zone (cooler, bag) positioned to one side so it does not block movement through the space
- A dedicated spot for wet gear and sandy items at the edge of the shade perimeter, not inside the main seating area
For multigenerational groups, Copa's premium chairs are designed to pair seamlessly with their canopy systems, so there is no mismatch in height, ergonomics, or footprint. The Deluxe Bundle takes the guesswork out of this by providing a coordinated system where chair positions are designed to fit naturally within the canopy footprint.
UPF Considerations for Shade Placement
A UPF beach shade tent rated UPF 50+ blocks more than 98% of UV radiation passing through the fabric itself, according to the American Cancer Society's UV protection guidelines. However, the protection only applies to the area directly under the opaque fabric panels. Reflected UV from sand and water, as well as UV entering through open sides of the canopy, still reaches occupants.
To maximize UPF protection within your shade zone:
- Position the most sun-sensitive family members (infants, fair-skinned children, anyone on photosensitizing medication) under the deepest shade, directly beneath the center of the canopy
- Use the canopy's side panels (if equipped) to block low-angle morning or afternoon sun
- Do not assume that being under the canopy eliminates the need for sunscreen, reflected UV from white sand is significant and reaches exposed skin from below and from the open sides
- Pair the shade structure with lightweight sun-protective clothing for maximum protection during peak UV hours (typically 10 AM to 2 PM in most US coastal regions)
For more on building out a complete family beach setup that goes beyond just shade, the complete beach setup guide for families covers the full system from arrival to pack-out.
Step 7: Do a 60-Second Safety and Comfort Check (1 Minute)
Before sitting down and relaxing, spend exactly 60 seconds walking around the structure doing a final check. This is not paranoia, it is the step that prevents the two most common mid-day problems: structural failure due to a missed connection, and a family member getting hurt because of a trip hazard that was not noticed during setup.
Estimated time: 60 seconds, non-negotiable.
The 60-Second Walk-Around Checklist
- Check every pole connection point. Push gently on each pole to confirm it is fully seated. A pole that feels slightly loose will work its way loose completely within an hour under wind load.
- Check all anchor points. Wiggle each anchor attachment gently. Zero movement is the target. Any movement means re-seating the anchor deeper.
- Check guy lines and stakes for trip hazards. If any guy line is running across a natural walking path to or from your setup, mark it with a bright-colored item or reposition the stake angle so the line runs parallel to foot traffic rather than across it.
- Check the canopy fabric for any stress points. Look for seams that are pulling, fabric that is bunching unevenly, or any area where the fabric is catching rather than flowing smoothly over the frame.
- Check the shade coverage for your youngest family members. Where will a crawling infant or a toddler who wanders be in 20 minutes? Is that area inside the shade perimeter?
- Confirm your exit paths are clear. In a genuine emergency, a fast-moving storm, a medical situation, you need to be able to exit the shade zone quickly in any direction without climbing over gear.
When to Call It and Start Over
If your walk-around reveals more than two significant issues (a pole that will not seat, an anchor that will not hold in the current sand, a canopy that is visibly stressed), it is faster to take the whole structure down and start fresh with better positioning than to try to patch a fundamentally flawed setup. A five-minute reset is always preferable to an hour of incremental adjustments or, worse, a structural failure mid-day.
Step 8: Pack Down for Speed on the Way Out (2 Minutes)
Fast setup and fast pack-down use the same underlying principle: sequence matters more than speed. Families who tear everything down simultaneously end up with tangled poles, sandy connectors, and a canopy that will not fit back into its bag. Families who pack down in sequence are done in two minutes.
Estimated time: 2 minutes.
The Reverse Assembly Rule
Pack down in the exact reverse order of setup:
- Remove all personal items and gear from the shade zone first. Chairs, cooler, bags, move everything clear before touching the structure. Trying to pack down a canopy while chairs are still inside it turns a two-minute job into a six-minute one.
- Release tension from all guy lines first. Do not pull stakes before releasing tension, this can cause the structure to snap and potentially injure someone, and it bends or breaks stakes.
- Remove the canopy fabric before disassembling the frame. Fold or roll it as you go, not after everything is in a pile on the sand.
- Remove anchors using the reverse rotation motion. The same rotating action that inserted the Anchor Max® extracts it cleanly. Yanking straight up is how anchors get bent or how the sand collapses and buries the anchor shaft.
- Disassemble the frame in the reverse order of assembly, outer legs first, then the center hub, then the center pole.
- Wipe or shake sand off each component before returning it to the bag. Sand inside a storage bag is the leading cause of stuck connectors and jammed poles on the next trip.
The Leave-No-Trace Close
Before walking off your spot, do one visual sweep of the entire footprint. Fill in any anchor holes completely, not just partially. Buried anchor holes are a hidden ankle-roll hazard for other beachgoers and in many jurisdictions, leaving holes open is a code violation. Take any trash, including zip ties, packaging fragments, and broken connectors, with you.
For a full packing framework that covers every item from sunscreen to seating, the ultimate family beach packing list is an essential companion resource.
Choosing the Right Beach Canopy for Your Family's Needs
Not all beach canopies are built equally, and the difference between a best beach canopy for families and a frustrating purchase often comes down to three factors: anchor system quality, UPF rating, and pack size relative to what your family actually carries to the beach.
The Anchor System Is the Most Important Feature
Every other feature on a beach canopy, the fabric, the poles, the color, is secondary to whether the structure stays in the ground. A beautiful canopy that blows away at the first gust is worse than useless; it is a safety hazard. This is why Copa's patented Anchor Max® is the feature that most consistently distinguishes their shade system from generic beach canopies on the market.
When evaluating any beach canopy setup system, ask:
- Does the anchor system work specifically in sand, or is it designed for soil or grass?
- Does the anchor use mechanical advantage (rotation, fluke design, or dead-man anchoring) or does it rely solely on friction?
- How deep does the anchor need to be for effective hold, and is that depth achievable without special tools?
- Can the anchor be reset quickly if conditions change?
Friction-only stakes fail in conditions where they are needed most: dry sand on windy days. Mechanical-advantage anchors like the Anchor Max® hold precisely because the design converts upward pull into lateral resistance within the sand column.
UPF Rating: What the Numbers Actually Mean
A UPF beach shade tent rated UPF 50+ is the minimum standard worth considering for a family with children. According to the Skin Cancer Foundation's guidance on UV-protective materials, a UPF 50+ rating means the fabric transmits just 2% or less of UV radiation. By comparison, a standard cotton T-shirt offers roughly UPF 5 protection, meaning the right canopy fabric is dramatically more protective than most people intuitively assume.
For infants under six months old, the American Academy of Pediatrics recommends keeping them out of direct sunlight entirely, making a UPF-rated shade structure not just a comfort item but a genuine health tool.
Size and Pack Format
A canopy that is too small for your family group creates shade competition and leaves someone sitting in the sun. The general sizing guidance:
| Family Group Size | Minimum Canopy Footprint | Recommended Footprint | Notes |
|---|---|---|---|
| 2 adults + 1 infant | 6 ft × 6 ft | 8 ft × 6 ft | Allows gear zone + play space |
| 2 adults + 2–3 kids | 8 ft × 8 ft | 10 ft × 8 ft | Room for chairs, blanket, and cooler |
| Multigenerational group (4–6 adults) | 10 ft × 10 ft | 12 ft × 10 ft or multiple structures | Two coordinated cabanas often more stable than one large one |
| Extended family (6+ people) | Two separate structures | Two 8 ft × 8 ft structures staggered | Better wind management and flexibility |
What Actually Goes Wrong: Troubleshooting Real Setup Failures
No setup guide is complete without addressing what happens when things do not go according to plan. The following are the most common real-world problems families encounter during beach canopy setup, and the specific fixes that work.
Problem: The Anchor Won't Hold in Soft Sand
What's happening: The anchor is not deep enough, or the sand is so dry and loose that there is no compaction to resist against.
Fix: Pour a small amount of water from your cooler or water bottle into the anchor hole before inserting the anchor. Let it sit for 20 to 30 seconds to slightly compact the surrounding sand. Then insert the anchor using the rotation method to full depth. The moisture creates enough cohesion to significantly improve hold. Alternatively, move five to ten feet toward the water where the sand is naturally more compact.
Problem: A Pole Won't Seat Fully Into the Connector
What's happening: Sand or debris is in the connector socket, or the connector is slightly bent from a previous trip.
Fix: Blow out the socket or use a small stick to clear debris. If the connector is bent, gently work it back with your hands, do not force a pole that is not seating correctly, as this can cause the connector to crack under load. A drop of water in the socket can also help the pole slide in if salt residue is causing friction.
Problem: The Canopy Is Ballooning and Pulling Upward
What's happening: The wind is getting under the canopy from the windward side, creating lift. This is the most dangerous failure mode because it can extract anchors rapidly.
Fix: Lower the windward side of the canopy if the structure allows height adjustment. Close any open side panels on the windward face. Add additional weight (a full cooler, filled water bottles in a bag) to the base of the windward anchor point. If conditions are persistently severe, take the structure down, a canopy in 25+ mph sustained wind is a safety risk regardless of anchor quality.
Problem: The Canopy Fabric Won't Clip Onto the Frame
What's happening: The fabric is installed out of sequence, or one side is attached before the opposite side is in position, creating too much tension for the clips to reach.
Fix: Unclip everything and start from the center attachment point, working outward to the corners. Attach diagonally opposite corners simultaneously (front-left and back-right, then front-right and back-left) to distribute the fabric evenly and make each attachment point reachable without forcing it.
How to Make Every Future Setup Faster
The setup process described in this guide gets faster with repetition. Most families who practice it at home once before their first trip, in the backyard or even in a parking lot, report that their on-beach time drops dramatically on the actual beach day. The unfamiliar steps become automatic, the anchor process becomes intuitive, and the layout staging becomes second nature.
The At-Home Practice Run
Before a major beach trip (especially with young children who have limited patience for a slow setup), do one full practice run at home. Set the entire structure up on grass or in the driveway, including anchoring (use a tent stake in soft ground as a stand-in). Do the 60-second safety check. Then pack it all down using the reverse assembly sequence. Time yourself. On most first practice runs, families complete this in 12 to 15 minutes. By the third or fourth repetition, the same process takes 6 to 8 minutes. That time gain transfers directly to the beach.
Gear Storage That Enables Fast Setup
How you store beach gear between trips directly affects how fast you can set up next time. The goal is to return everything to the bag in exactly the configuration you want to find it in. This means:
- Poles stored in the same orientation every time (base-end first or tip-end first, pick one and stick to it)
- Connectors stored in a small mesh bag inside the main bag, not loose at the bottom
- Anchor components stored separately from the poles so they do not rattle and scratch the pole finish
- The canopy fabric folded (not stuffed) so it unfurls cleanly rather than in a tangled bundle
- Guy lines coiled with a simple figure-eight wrap so they do not knot during storage
Families who treat pack-down storage as part of the setup process for next time consistently set up faster than those who stuff everything in the bag and deal with it later.
For more on how to make the entire beach day run smoothly, not just the shade setup, the Copa Beach Tips blog covers everything from packing strategy to sun safety for families with young children.
Frequently Asked Questions About Beach Cabana Setup
How long does it actually take to set up a beach cabana for the first time?
For most families setting up a beach canopy for the first time without prior practice, the realistic time is 15 to 20 minutes. After one or two practice sessions (either at home or after the first real beach trip), this drops to 8 to 12 minutes. Families who follow the staging method described in this guide, laying out components before connecting them, typically shave 5 to 7 minutes off their first-attempt time.
Do I need two people to set up a beach cabana?
For most hub-and-spoke canopy designs, one person can complete the setup, though it is harder and slower. The two steps that genuinely benefit from a second adult are: raising the frame when the canopy fabric is attached (one person holds while the other adjusts), and managing the canopy fabric on a windy day before the first anchor is set. If you are regularly setting up solo, consider getting the canopy fabric attached before raising the frame to its full height.
What makes the Anchor Max® different from regular beach umbrella anchors?
Copa's patented Anchor Max® uses a mechanical advantage design rather than relying on friction alone. The system is engineered specifically for sand, using a rotation-based insertion that displaces sand laterally, creating a wider underground footprint than the surface hole suggests. This means the hold strength increases as upward or lateral force is applied, the opposite of what happens with friction-based stakes, which loosen as load increases. It is also designed for quick extraction using the same rotation motion in reverse, making pack-down as fast as setup.
What UPF rating should I look for in a beach shade tent?
UPF 50+ is the standard to look for in any shade structure intended for sun protection. This rating indicates that the fabric transmits 2% or less of UV radiation. For families with infants, young children, or fair-skinned individuals, UPF 50+ fabric is the minimum acceptable standard. Note that UPF protection applies only to the opaque fabric areas, open sides and reflected UV from sand still require sunscreen coverage.
Can I set up a beach cabana on wet sand near the waterline?
Yes, and in many ways wet sand near the waterline is actually better for anchoring than dry mid-beach sand. Wet, compacted sand offers significantly more resistance to anchor extraction than dry loose sand. The main consideration is tide tracking: if you set up near the waterline, check the tide schedule and make sure your shade zone will not be in the path of incoming tide within the next few hours. Set up above the high-tide line marked by the band of shells and debris on the beach.
How do I handle wind during setup, should I abandon the setup if it's too windy?
Wind under 15 mph is manageable with proper technique (keeping fabric rolled until the frame is fully assembled and at least two anchors are set). Wind between 15 and 25 mph requires extra care: anchor all four corners before fully opening the canopy, use side panels to reduce drag, and check tension more frequently. Sustained wind above 25 mph is genuinely dangerous for canopy structures, and the correct decision in those conditions is to take the structure down and wait for conditions to improve. No shade structure is engineered to be safe in high-wind conditions, regardless of anchor quality.
How often should I check the anchors during a full beach day?
Check anchor tension every 60 to 90 minutes. Sand settles around anchor points, especially in the first hour after setup, which can reduce effective hold. Wind conditions also change throughout the day, and a setup that was perfectly tensioned in the morning may be slightly loose by midday. A 30-second tension check each time you get up for water or to check on the kids is a sustainable habit that prevents most structural failures.
Is one large canopy better than two smaller ones for a big family group?
For groups of six or more, two coordinated mid-size canopies are often preferable to one very large canopy. Large single structures have a greater wind load footprint, require more complex anchoring, and if they fail, they fail completely. Two smaller structures can be angled to create shade at different times of day, can accommodate different subgroups within the family (a quieter adult area and a more active kids zone), and if one needs to come down in a sudden wind event, the other provides backup shade. The Copa Deluxe Bundle is a particularly good starting point for families building out a multi-structure setup.
Can I leave a beach cabana up unattended while we swim?
A properly anchored cabana can be left unattended for short periods (20 to 30 minutes), but it should not be left unmonitored for longer than that, particularly in changing wind conditions. The risk is not just structural, an unattended canopy that collapses or shifts can become a hazard to other beachgoers. If you need to be in the water for an extended period, take 60 seconds to tighten all anchors and lower any adjustable canopy panels before leaving the shade zone.
What is the best way to clean and store a beach canopy after a trip?
Rinse all metal components with fresh water as soon as possible after a beach trip, salt is highly corrosive and will accelerate wear on connectors, hinges, and anchor shafts. Allow the canopy fabric to dry completely in the shade before storing (not in direct sun, which degrades UV-protective coatings over time). Store connectors and anchors in a separate mesh bag to prevent them from scratching pole finishes. Never store a damp canopy in a sealed bag, mold and mildew develop quickly and permanently damage the fabric.
Does the angle of the sun change how I should orient my beach canopy?
Yes, significantly. In the morning, the sun comes from the east, so orienting the closed back of the canopy to face east provides maximum shade for occupants facing west toward the water. As the sun tracks overhead and toward the west in the afternoon, you may need to rotate the entire structure 90 to 180 degrees, or at minimum adjust side panels to compensate. Families who plan to be on the beach for a full day benefit from setting up with the noon-sun position in mind as the primary orientation, since that is when UV intensity is highest and proper shade coverage matters most.
Are beach cabana permits required at US beaches?
Permit requirements vary widely by municipality. Many public beaches in Florida, California, New Jersey, and New York have rules about canopy size, placement distance from the water, and whether shade structures above a certain footprint require a permit or daily fee. Some National Seashore beaches (Cape Cod, Cape Hatteras, Assateague) have specific rules about shade structures and anchoring. Always check with the specific beach authority before your trip, particularly if you are planning a large setup or a multi-day visit to the same location.
Key Takeaways
- Preparation before you hit the sand cuts setup time by half. A parking-lot gear check and pre-assembly of connectable components are the two highest-leverage actions in the entire process.
- Spot selection is a structural decision, not just a comfort preference. Wind direction, sand compaction, and sun angle all directly affect how well your canopy performs and how long it stays up.
- The Anchor Max® works differently than friction stakes, its mechanical-advantage design creates hold that increases under load rather than decreasing, which is the critical distinction in windy conditions.
- Staging components before assembly (not after) is the single biggest time-saver in the entire setup process. Lay everything out spatially before connecting anything.
- UPF 50+ fabric matters, but reflected UV still reaches your family from sand and open canopy sides. Sunscreen remains necessary even under a rated shade structure.
- Pack down in reverse assembly order and wipe components clean before returning them to the bag. This directly determines how fast your next setup will be.
- One at-home practice run before a major beach trip consistently reduces on-beach setup time to under 10 minutes for most families.
- Check anchor tension every 60 to 90 minutes throughout the day. Sand settles, wind changes, and what was taut in the morning is often loose by afternoon.
A beach day with young children should begin the moment you step onto the sand, not 20 minutes later after a wrestling match with poles and stakes. The method outlined here, scout, stage, assemble, anchor, tension, configure, and check, turns what most families treat as a chore into a repeatable six-to-eight-minute routine that gets easier every single trip. For families who want to skip the learning curve entirely, Copa's coordinated bundles pair the right chairs, the right shade structure, and the Anchor Max® system in a single order, so the only variable left is which beach to choose. For inspiration on that front, the best beaches for holiday weekend trips is a solid place to start planning.
Shop Now
Learn more →
Share:
Sun Protection at the Beach: A Practical Guide for Parents with Young Children
Beach Umbrella vs. Beach Cabana: A Feature-by-Feature Comparison for Families